Good morning!
Or afternoon.....or night....depends on where in the world you are!
I have just been checking my 'stats' and am
thrilled to see I have had folks from Spain, Malaysia, Israel, Egypt, Russia, South Korea, Mexico, Norway, the United Kingdom, and Italy visit - in addition to the United States!!!
Wow! Thanks for spreading the news of my blog! :0)
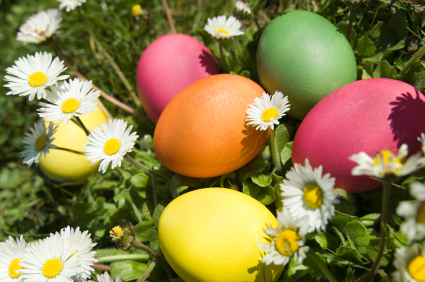
Today's focus is on Easter Eggs!
As I was looking through my files and some searches on Google, I had so much fun checking out all the pretty eggs! I have taken photos of the first batch of eggs that I have decorated this year, and hope to download them to edit later today.Let's start with these lovelies:
Simple directions:Start out with plastic eggs. Yep, plastic!Apply various stickers - in this case multi-colored dots.
You're done! What a great craft for
little ones to participate in.
Now
another idea:Start by dying hard boiled eggs in various shades. Use those cheap Easter Egg dye kits! I get mine at the
Dollar Store.
Get out your wonderful
Aleene's Tacky Glue in the gold bottle, and scraps of ribbon, little silk flowers and stick on flat back rhinestones.
Check out the photos for placement ideas.
The artist as also used tiny felt flowers and a small covered button.
Beautiful!
Many churches do
not have 'children's hour' during the Easter Sunday service. I think this is great. Even little ones need to learn how to behave during a church service (or a concert, or a play...). Most churches have some kind of special service to celebrate the Risen Saviour. Our church always has a terrific choir cantata. The kids don't have to sit through a (very long to them) sermon (Pastor does have a short sermon however!), and can celebrate with the music, even if they are too little to understand the words yet.
So, what are those kids supposed to do during that time? I think it is unreasonable to expect children to all of a sudden be quiet for perhaps a one and one half hour service, much of it sitting.
I know some parents bring an assortment of crayons and coloring pages. But why are the kids coloring Tinker Bell in church? Let's at least use that coloring time for a subject that relates to the service.
When I was growing up Dad often asked my sister and I, after church, what we learned that Sunday. Oooo, I hated that! That meant I had to pay attention to at least part of the service to be able to answer him! (My sister perfected the "open eyes sound asleep" thing. I was so jealous!)
So, here's my suggestion:
Go back through some of my blogs, and print out the coloring pages that you think would be relative to an Easter Sunday service.
Not a parent?
That's okay! You may be a grandparent, aunt, uncle, cousin or just the lady that sits behind the family with kids.
BE PREPARED!!
Here are a few pages to get you started:
Here is another simple but oh-so-pretty Easter Egg project for displays:
First the hard part:
Blow out the eggs. That means taking a
T pin (or corsage pin) and poke a hole in the top (pointed) end of the egg. Take a
smaller pin and poke a hole in the bottom. Now go back to the pointy end. Make the hole larger, to be able to fit a few thin stems of flowers. Really,
not too big!
Now....Blow through the tiny pricked end, and the raw egg will come out the bigger hole.
Yeah, that's the only way to do it that I have discovered.
Keep blowing. You can encourage things by poking the yolk inside with your Tpin to break things up.
Keep blowing until empty.
Sit, let the oxygen return to your brain.
Do another one!
Now take a ni
ce paper cup - not the styrofoam unless that is all you have. Trim the cup to go half way up the egg. Tall enough so the egg doesn't topple over.
You can add a
few glass marbles to the bottom to prevent tipping also. Make sure you re-adjust the height of the paper cup.
Gather some
little silk grass blades, or use Easter Egg crumpled paper grass, or cut your own little snippets of tissue paper or crepe paper into tall leaf blades.
Just before you wish to display, snip some
small flowers. Some ideas are johnny-jump-ups, daisies, columbines, pansies, or the small narcissus (daffodils). Fill each egg with
water. The tiny hole from the bottom should have 'self healed' so very few water drops should escape. Place flower in top. Place egg vase in the cut paper cups. Arrange a few leaves on the outside. Refer to photo.
Are your eggs leaking too much water? Try a quick dab of hot glue.
Why not use these as name place markers, using a pen to write each name on an egg cup. After nuncheon, the guests can take their own egg vases home.
These eggs were made in the Ukraine, but using traditional Mexican patterns:
I won't go into details on how to make these,
but it involves bee's wax coating the egg,
and then pressing seed beads into the wax.
Not sure, but the artist perhaps used decals? For instance, dye the hard boiled egg baby yellow. Then apply decal. Smooth edges with a fingernail. Dye egg spring green. Remove the decals, and you get the egg in the top row.
A felted egg with beaded embellishments:
These are painted wood eggs:
Or perhaps we should just wait for the Easter Bunny to decorate our eggs?
So who created the Easter Bunny any-who-how?
Think about it.
Doesn't make sense, other than eggs and rabbits are both strong fertility symbols.
Here's an unusual Easter wannabe Bunny!
American proverbs:
'Don't put all your eggs in one basket' - means:
don't plan on an outcome before it actually happens.
Here is another Easter Egg dying tip:
Place one teaspoon of cooking oil in the prepared dye.
This will make irregular spots on the eggs!
Hope you have enjoyed this Easter Egg-cellent blog!
inkspired